User Guide
Duke Driver is a desktop app assisting delivery men with managing delivery jobs and contacts. If you are looking to perform better at your delivery job, Duke Driver can assist you to finish your tasks more efficiently, according to your requirements.
Table of Content
- How to use this guide?
- Quick start
- Windows and Features Overview
- Features
How to use this guide?
This user guide is an in-depth documentation on all the features that Duke Driver has.
The command summary section allows you to quickly scan all the commands if you are an experienced user attempting to discover a specific command.
Look up the feature in the Table of Contents and navigate to the appropriate section to obtain a detailed description of Duke Driver’s features. Each section includes a thorough explanation of the function, its command syntax, some examples of potential applications, and information on expected results.
If you are a first-time user, you can begin by reading the Quick Start section!
Quick start
- Ensure you have Java
11or above installed in your Computer. - Download the latest
dukeDriver.jarin the latest release from here. - Copy the file to the folder you want to use as the home folder for your Duke Driver.
- Open a command terminal,
cdinto the folder you put the jar file in, and use thejava -jar dukeDriver.jarcommand to run the application.
A GUI similar to the below should appear in a few seconds. Note how the app may contain some sample data.
- Type the command in the command box and press Enter to execute it. e.g. typing
helpand pressing Enter will open the help window.
Some example commands you can try:-
list: Lists all contacts. -
list_job: Lists all jobs. -
stats: Opens statistics window. -
timetable: Shows timetable of current week. -
exit: Exits the app.
-
- Refer to the Windows and Features Overview and Features below for details of each command.
Windows and Features Overview
Duke Driver has 5 main windows: Delivery Job Window (Main Window), Customer Window (Window for customers’ address book), Timetable Window, Reminder Window, Statistics Window.
Moreover, apart from the main Timetable Window (i.e. window for Scheduled Jobs), there are also 2 more minor types of window: Unscheduled Jobs Window and Completed Jobs Window.
All windows could be accessed from Main Window, simply by using these commands:
-
list: Opens Customer Window, lists all customers in Address Book, refer to 1. Features related to Customers for more details. -
-
timetableortimetable_date date/YYYY-mm-DD: Opens Timetable Window of appropriate week, consists of scheduled jobs in that week (i.e. uncompleted jobs with delivery dates and slots). -
timetable_unscheduled: Opens Unscheduled Jobs Window - list of unscheduled jobs (i.e. jobs without delivery dates and/or (invalid) slot). -
timetable_completed: Opens Completed Jobs Window - list of completed jobs. - Refer to 4. Features available for Timetable for more details.
-
-
stats: Open Statistics Window, refer to 5. Features available for Statistics for more details. -
list_reminder: Lists all reminders and opens Reminder Window, refer to 3. Features available for Reminders for more details.
Alternatively, you can simply click on the corresponding button to open the window you want.
Features
![]() Notes about the command format:
Notes about the command format:
-
Words in
UPPER_CASEare the parameters to be supplied by the user.
e.g. inadd n/NAME,NAMEis a parameter which can be used asadd n/John Doe. -
Items in square brackets are optional.
e.g.n/NAME [t/TAG]can be used asn/John Doe t/friendor asn/John Doe. -
Items with
… after them can be used multiple times including zero times.
e.g.[t/TAG]…can be used ast/friend,t/friend t/familyetc. -
Parameters can be in any order.
e.g. if the command specifiesn/NAME p/PHONE_NUMBER,p/PHONE_NUMBER n/NAMEis also acceptable. -
If a parameter is expected only once in the command but you specified it multiple times, only the last occurrence of the parameter will be taken.
e.g. if you specifyp/12341234 p/56785678, onlyp/56785678will be taken. -
Extraneous parameters for commands that do not take in parameters (such as
help,list_job,exitandclear) will be ignored.
e.g. if the command specifieshelp 123, it will be interpreted ashelp.
1. Features related to Customers
To access the address book containing all customers from Main Window, please use command
list to list all customers and open Customer Window. Alternatively, you can click on
Customers in menu bar > Address Book.1.1. Adding a person: add
Adds a person to the address book.
Format: add n/NAME p/PHONE_NUMBER e/EMAIL a/ADDRESS [t/TAG]…
- Customers’ name should only include Latin alphabet and/or numeric characters.
- Phone number must be at least 3 digits long.
1. A person can have any number of tags (including 0).
2. System does not check for duplicate emails.
Examples:
add n/John Doe p/98765432 e/johnd@example.com a/John street, block 123, #01-01add n/Betsy Crowe t/friend e/betsycrowe@example.com a/Newgate Prison p/1234567 t/criminal
1.2. Listing all persons : list
Shows a list of all persons in the address book in Customer Window.
Opens Customer Window.
Format: list
1.3. Editing a person : edit
Edits an existing person in Customer Window.
Format: edit INDEX [n/NAME] [p/PHONE] [e/EMAIL] [a/ADDRESS] [t/TAG]…
- Edits the person at the specified
INDEX. The index refers to the index number shown in the displayed person list. The index must be a positive integer 1, 2, 3, … - At least one of the optional fields must be provided.
- Existing values will be updated to the input values.
- When editing tags, the existing tags of the person will be removed i.e adding of tags is not cumulative.
- You can remove all the person’s tags by typing
t/without specifying any tags after it.
Examples:
-
edit 1 p/91234567 e/johndoe@example.comEdits the phone number and email address of the 1st person to be91234567andjohndoe@example.comrespectively. -
edit 2 n/Betsy Crower t/Edits the name of the 2nd person to beBetsy Crowerand clears all existing tags.
1.4. Locating persons by name: find
Finds and lists persons whose names contain any of the given keywords.
Format: find KEYWORD [MORE_KEYWORDS]
- The search is case-insensitive. e.g
hanswill matchHans - The order of the keywords does not matter. e.g.
Hans Bowill matchBo Hans - Only the name is searched.
- Only full words will be matched e.g.
Hanwill not matchHans - Persons matching at least one keyword will be returned (i.e.
ORsearch). e.g.Hans Bowill returnHans Gruber,Bo Yang
Examples:
-
find JohnreturnsjohnandJohn Doe -
find alex davidreturnsAlex Yeoh,David Li

1.5. Deleting a person : delete
Deletes the specified person from the address book.
Format: delete INDEX
- Deletes the person at the specified
INDEX. - The index refers to the index number shown in the displayed person list.
- The index must be a positive integer 1, 2, 3, …
Examples:
-
listfollowed bydelete 2deletes the 2nd person in the address book. -
find Betsyfollowed bydelete 1deletes the 1st person in the results of thefindcommand.
1.6 Clearing all contact entries : clear
Clears all contact entries from address book (i.e. in Customer Window).
Format: clear
2. Features related to Delivery Jobs
ctrl-c from the job list.
2.1. Adding a job: add_job
Adds a delivery job to the delivery job system.
Format: add_job si/SENDER_ID ri/RECIPIENT_ID earn/EARNING [date/DELIVERY_DATE] [slot/DELIVERY_SLOT]
- Adds the job to delivery job system.
-
SENDER_IDandRECEIPIENT_IDmust be valid IDs (i.e. must exist in address book). -
SENDER_IDandRECEIPIENT_IDis case sensitive. - Delivery date and slot are optional, however, if specified, they need to be specified together for scheduling (i.e. users are not allowed to specify only delivery date and leave delivery slot empty - and vice versa).
- Delivery date must be in format YYYY-mm-DD and must be a valid date.
- Delivery slot must be a positive integer and valid slots should be within the range from 1 to 5 (example:
slot/1).- Slot 1: 10AM - 11AM
- Slot 2: 11AM - 12PM
- Slot 3: 1PM - 2PM
- Slot 4: 2PM - 3PM
- Slot 5: 3PM - 4PM
- Delivery slots must start from 1 (i.e.
slot/1- delivery slots only start from 10AM), however, could also be larger than 5 (i.e.slot/6). - Delivery slots larger than 5 (outside valid range, i.e.
slot/6) will be classified as “Extra hours (4PM++)”. These delivery slots are still considered invalid slots. - Earning must be a double and could contain more than 2 decimal inputs, Earning cannot be larger than 99999 (validation avaiable as of v1.4).
Examples:
add_job si/ALESAM ri/DAVSAM earn/1.1add_job si/ALESAM ri/DAVSAM date/2023-04-01 slot/3 earn/20
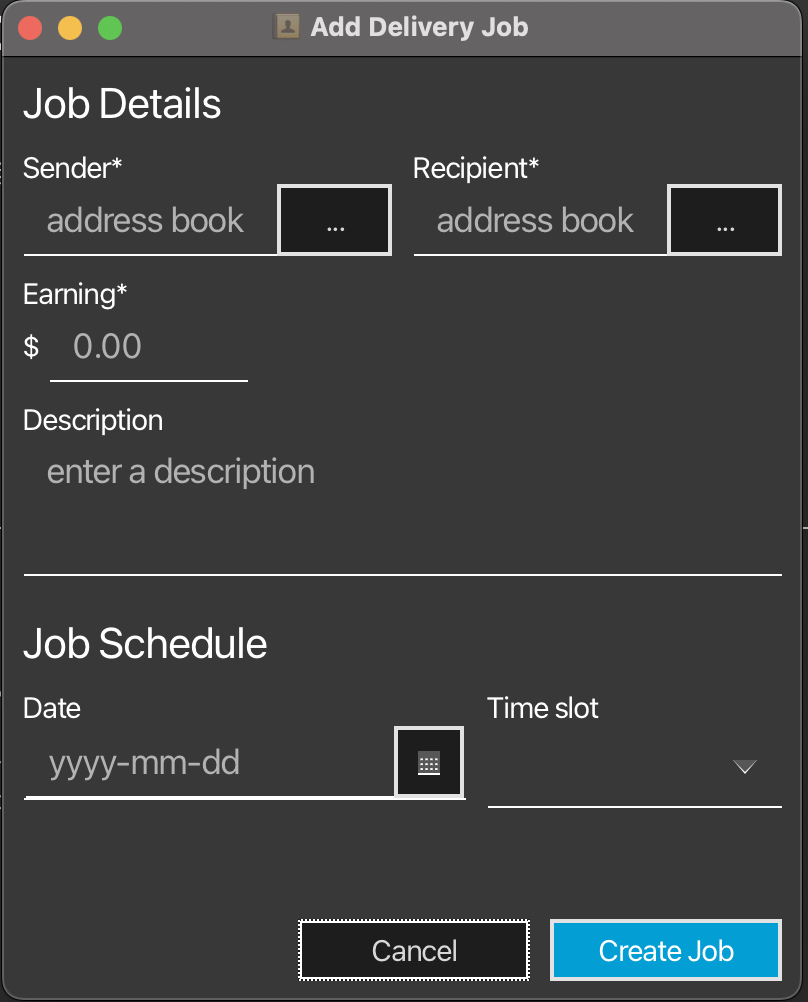
Alternative:
Click on Delivery Job System in menu bar > Create Job. Fill in relevant details and click Create Job button. (Click Cancel button to stop adding)
1. Description field is only available in GUI mode.
2. Earning field allows for more than 2 decimal inputs.
3. Command constrains applies to GUI mode.
2.2. Mass importing jobs
Format: Click on Delivery Job System in menu bar > Import Jobs > select a file containing all the jobs to be imported
- File must be a CSV file.
- There must be a header row as the first row will be skipped when file is parsed.
- These columns
RecipientSenderDelivery dateDelivery slotPriceRecipientRecipient NameRecipient PhoneRecipient EmailRecipient AddressRecipient TagSender NameSender PhoneSender EmailSender AddressSender Tagmust exist. - The optional details may be filled in with “na”. e.g.
Sender's Tagmay be “na”. - Tags should be input with a spacing between each tag. e.g. “Customer Nearby”, to tag as 2 tags: customer and nearby.
- If recipient/ sender does not already exist in customer address book i.e. new customer, recipient/ sender will also be added into the address book.
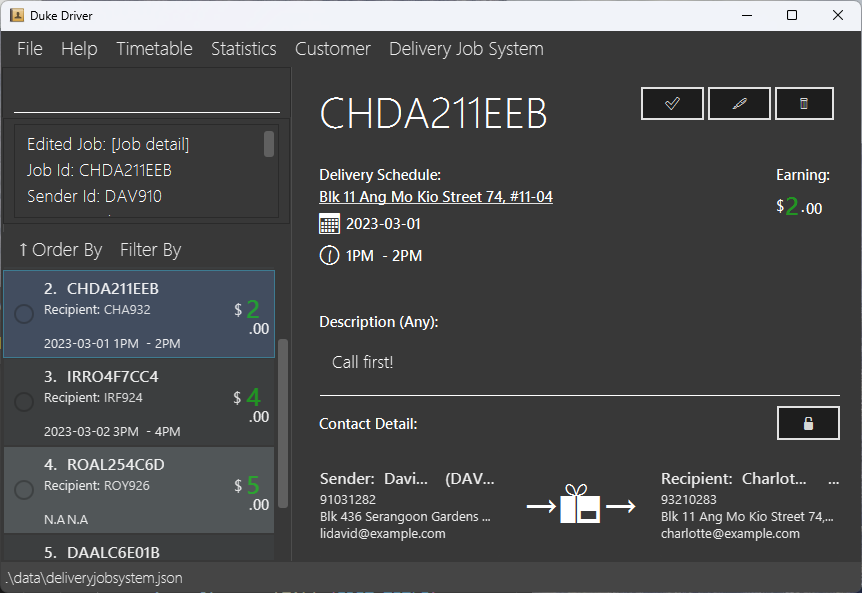
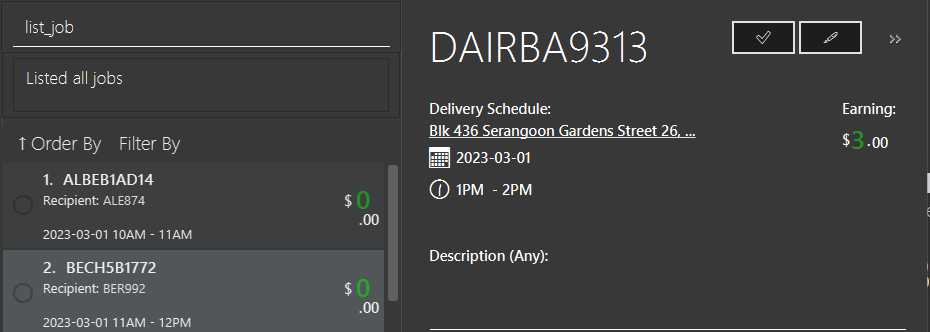
2.3. Listing all jobs : list_job
Shows a list of all jobs in the delivery job system in Main Window.
Format: list_job
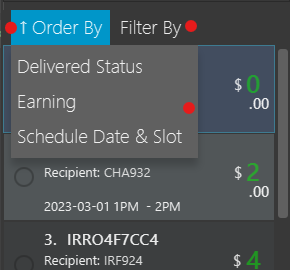
Sorting and filtering job list
Simply click on the corresponding button to sort and filter jobs.
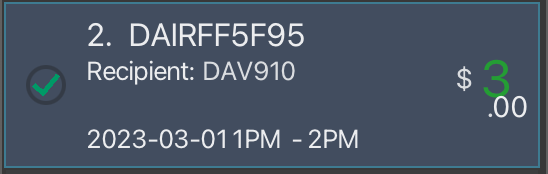
View details of a specific job
Simply click on the job card in job list to view its details in the right half of Main Window.
To hide/un-hide the contact details of the chosen job, simply click on the (Un)Lock Button.


2.4 Edit job : edit_job
Edit a selected job by Index or Job ID.
Format: edit_job INDEX [si/SENDER_ID] [ri/RECEIPIENT_ID] [date/DELIVERY_DATE] [slot/DELIVERY_SLOT] [earn/EARNING] [done/t | f]
or edit_job ji/JOB_ID [si/SENDER_ID] [ri/RECEIPIENT_ID] [date/DELIVERY_DATE] [slot/DELIVERY_SLOT] [earn/EARNING] [done/t | f]
- Existing values will be overwritten by the input values.
- At least one of the optional fields should be provided.
- The optional field
done/t | findicates whether the job should be marked as completed or uncompleted. - Edits the delivery job at the specified
INDEXorJOB_IDprovided by user. - The index refers to the index number shown in the displayed job list.
- The index must be a positive integer 1, 2, 3, …
- Editing a completed job will reset the job to pending state.
- Refer to
add_jobfor argument constrains.
Examples:
edit_job 1 slot/4edit_job 1 done/tedit_job 1 date/2023-03-01edit_job ji/BECHE8833A si/ALESAM ri/DAVSAM date/2023-04-01 slot/3 earn/20
Alternative:
Select the delivery job to view its detail > Click on the middle pen button  on top right hand corner > Make changes > Click on
 Edit Job button
2.5 Find job : find_job
Finds all jobs which contain any of the specified keywords and displays them as a list with index numbers.
Format: find_job [ji/JOB_ID] [si/SENDER_ID] [ri/RECIPIENT_ID] [date/DELIVER_DATE] [slot/DELIVERY_SLOT] [earn/EARNING] [done/ t | f]
- There can be multiple keywords.
- Keywords are case-sensitive.
- The optional field
done/t | findicates whether the job should be marked as completed or uncompleted. - At least one of the optional fields must be provided.
- Refer to
list_jobfor argument constrains.
Examples:
find_job ji/BECHE8833Afind_job date/2023-03-01 slot/4find_job ji/BECHE8833A si/ALESAM ri/DAVSAM date/2023-03-01 slot/3 earn/20
2.6 Delete job : delete_job
Deletes the job identified by the job ID. Support del key in job list by selecting in job list.
Format: delete_job JOB_ID
ctrl-c from the job list.
- The job ID must be valid.
Example:
delete_job ALBE29E66F
Alternative:
Double-lick on the delivery job you want to delete to view its detail > Click on the right bin button  on top right hand corner
2.7 Mark job as completed/uncompleted : com_job / uncom_job
Marks the job identified by the job ID as completed or uncompleted.
Format: com_job JOB_ID / uncom_job JOB_ID
- The job ID must be valid.
ctrl-c from the job list.
Alternative 1:
Scroll to the job and click on the circle on the left, which a tick will appear in to show completion. Click again to uncomplete the job.
Alternative 2:
Select the delivery job to view its details > Click on the left tick button  on top right hand corner. Click on the button again to uncomplete job.
Example:
com_job ALBE29E66Funcom_job ALBE29E66F
3. Features available for Reminders
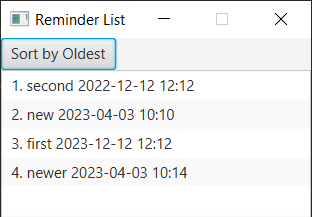
3.1. Listing all reminders : list_reminder
Shows a list of all reminders in Reminder Window.
Opens Reminder Window.
Format: list_reminder
3.2. Adding a reminder : add_reminder
Adds a reminder into Duke Driver.
Format: add_reminder [d/DESCRIPTION] time/YYYY-MM-DD HH:mm
- Adds a reminder with the specified
DESCRIPTIONandtime. - User will be notified at the specified
time. - The reminder will be reminded from the date time specified in
time/YYYY-MM-DD HH:mm. - If not snoozed, the reminder notification will refresh itself and pop up every 1 minute.
- Date must be valid.
-
DESCRIPTIONcan be left empty (optional). -
DESCRIPTIONis limited to 50 characters including space.
Examples:
-
add_reminderfollowed byd/Submit homework time/2023-12-12 12:00adds a reminder that will remind the user to submit their homework. The reminder will occur at 12pm, 12 December 2023 and user will be notified at such timing.
3.3. Deleting a reminder : delete_reminder
Deletes a reminder in Duke Driver.
Format: delete_reminder INDEX
- Deletes the reminder at the specified
INDEX. - The index refers to the index number shown beside the reminder.
- The index must be a positive integer 1, 2, 3, …
Examples:
-
list_reminderfollowed bydelete_reminder 2deletes the 2nd reminder in the address book.
4. Features available for Timetable
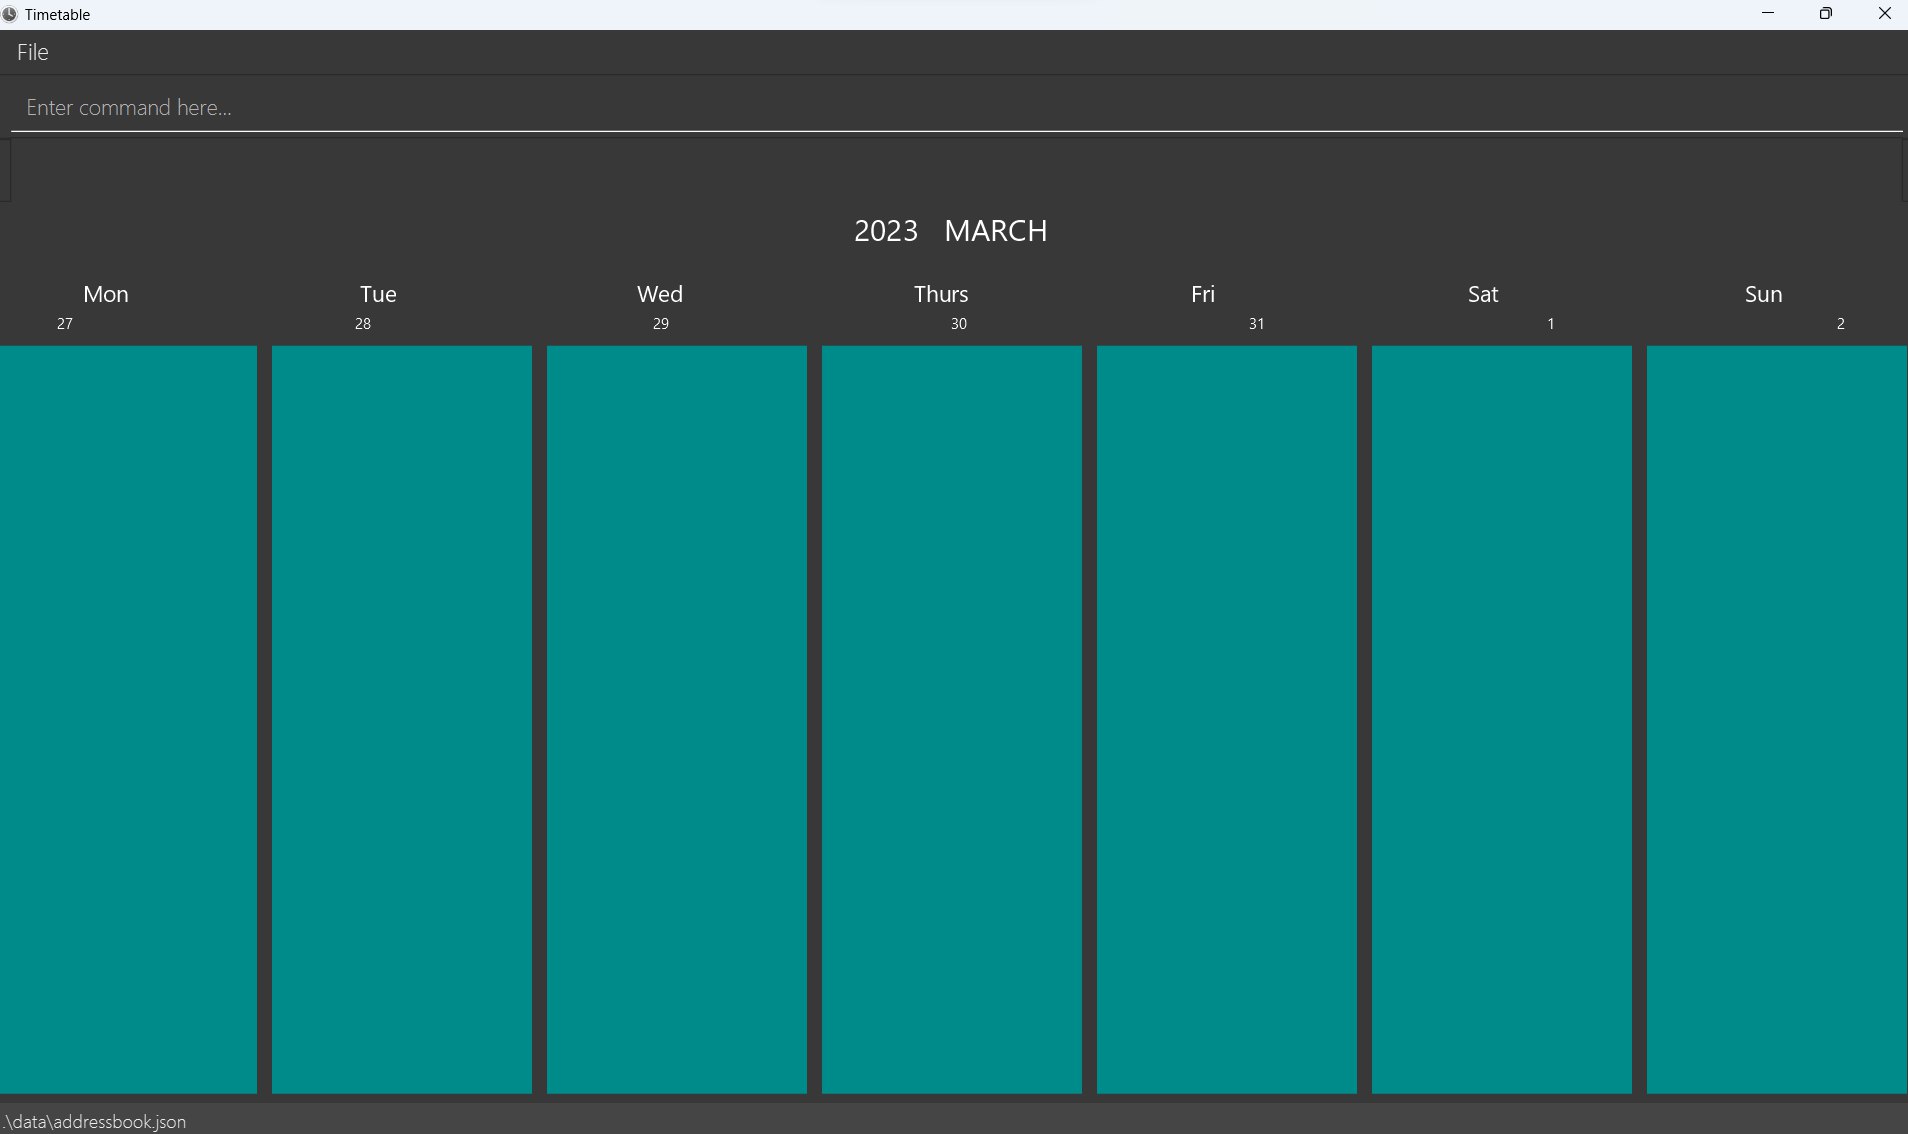
4.1. Showing timetable : timetable
Shows timetable of jobs, with the week shown being current week (LocalDate.now()).
Opens Timetable Window.
Format: timetable
Alternative: Click on Timetable in menu bar > Scheduled Jobs
4.2. Showing timetable of week containing specific date: timetable_date
help, exit), this is the only command that Timetable Window can access
Shows timetable of specific week containing a specific date.
Opens Timetable Window.
Format: timetable_date date/YYYY-mm-DD
- Shows timetable of the week containing the given date.
- Date must be valid and must only contain numeric characters and spaces.
- Date must be of format: YYYY-mm-DD.
- Along with
helpandexit, this is the one and only “special” command that Timetable Window can access (identical format).
Examples:
-
timetable_date date/2023-03-16shows timetable of jobs in week from 13th - 19th March 2023.
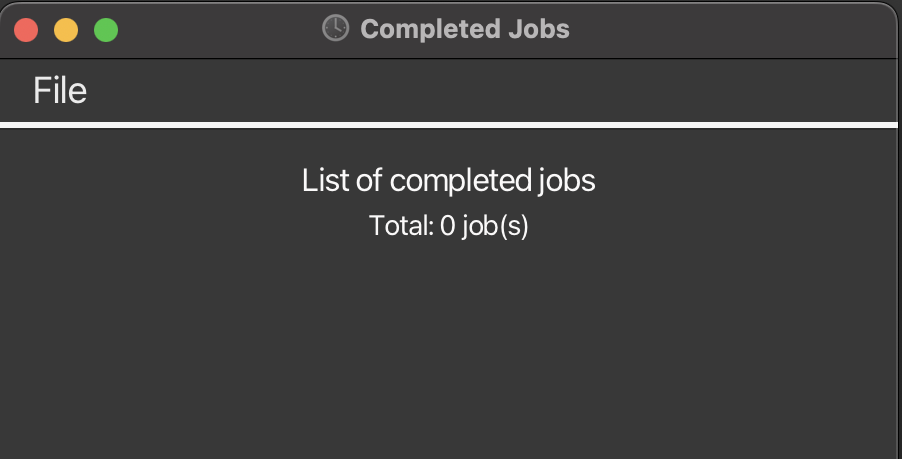
4.3. Showing list of completed jobs: timetable_completed
Shows list of completed jobs, sorted in increasing date and decreasing earning order.
Format: timetable_completed
Alternative: Click on Timetable in menu bar > Completed Jobs
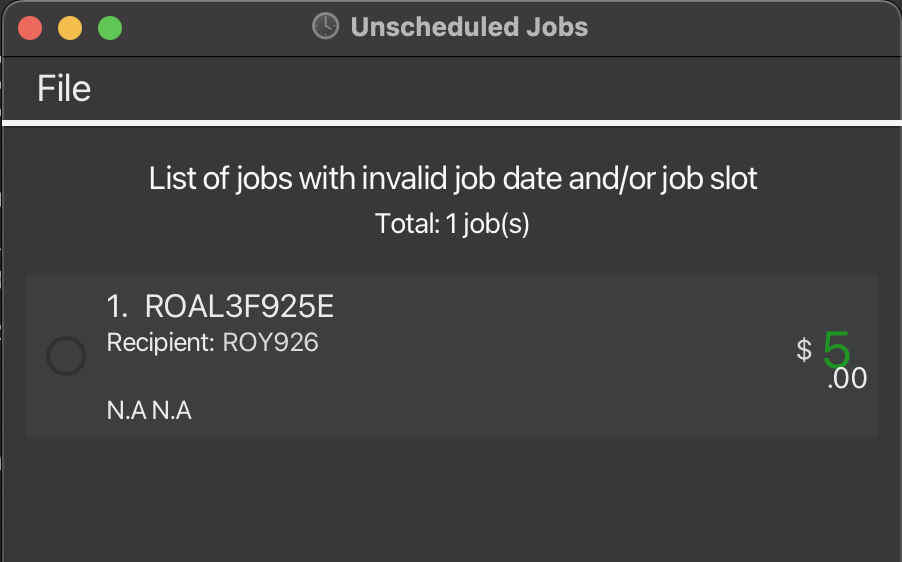
4.4. Showing list of unscheduled jobs: timetable_unscheduled
Shows list of unscheduled jobs (i.e. jobs with no delivery dates and/or (invalid) slots). Jobs are sorted in increasing date and decreasing earning order.
Format: timetable_unscheduled
Alternative: Click on Timetable in menu bar > Unscheduled Jobs
5. Features available for Statistics
5.1. Showing Statistics : stats
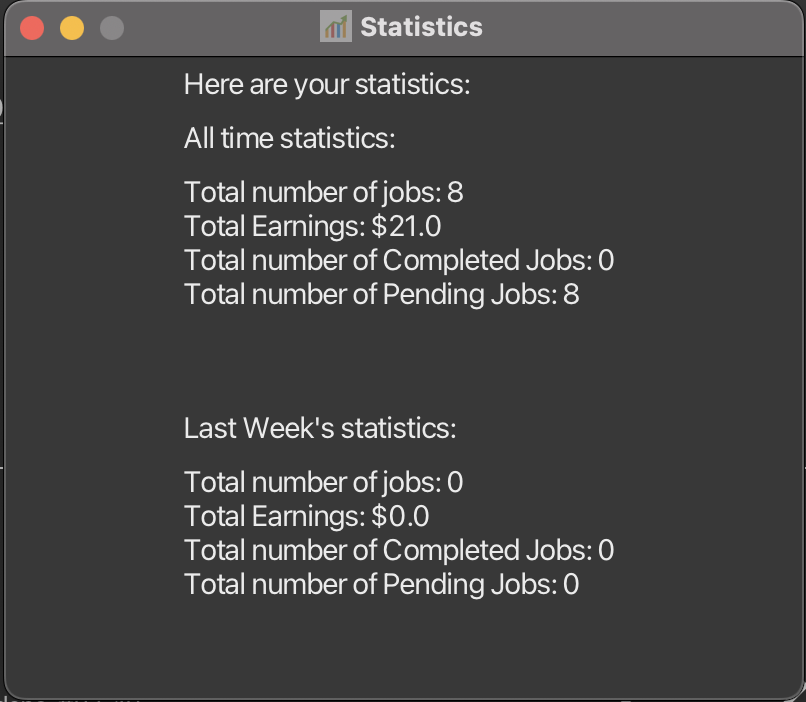
Opens Statistics Window.
Shows a summary of statistics related to the jobs in the job list
- Total number of jobs in the job list
- Total earnings from all jobs in the job list
- Total number of completed jobs in the job list
- Total number of pending jobs in the job list
Similar statistics are shown for jobs in the previous week
Other features
Viewing help : help
Shows a message explaining how to access the help page.

Format: help
- Command also available for Timetable and Customer Window (identical format).
Alternative: Click “Help” in menu bar > “Help”
help command also applies for Timetable Windows and Customer Window
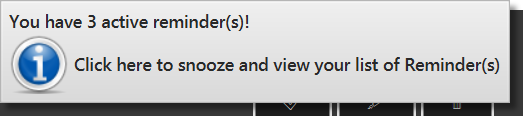
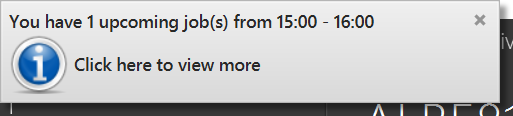
Notifications
Display notifications for reminders and upcoming scheduled jobs. Click on the respective notification body for more information.
Exiting the program : exit
Exits the program or current window.
Format: exit
- Command also available for Timetable and Customer Window (identical format).
Alternative: Click “File” in menu bar > “Exit”
exit command and alternative (GUI mode) also apply for Timetable Windows and Customer Window.
Saving the data
Duke Driver data are saved in the hard disk automatically after any command that changes the data. There is no need to save manually.
Editing the data file
Duke Driver data are saved as a JSON file [JAR file location]/data/addressbook.json and [JAR file location]/data/deliveryjobsystem.json. Advanced users are welcome to update data directly by editing that data file.
More specifically, Customers’ contacts and Reminder List is saved in [JAR file location]/data/addressbook.json, whereas delivery job list is saved in [JAR file location]/data/deliveryjobsystem.json.
* Invalid sender, recipient ID, slot however will not clear the job system, user can use the edit function to correct the job detail.
FAQ
Q: How do I transfer my data to another Computer?
A: Install the app in the other computer and overwrite the empty data file it creates with the file that contains the data of your previous AddressBook home folder.
Command summary
![]() Notes about the command information:
Notes about the command information:
- Commands that start with (C) could only be accessed from Customer Window
- Commands that start with (M) could only be accessed from Main Window
- Commands that start with (T) could only be accessed from Timetable Window
- Commands that start with (B) could be accessed from both Main and Customer Window
- Commands that start with (A) could be accessed from all 3 windows: Main, Customer and Timetable Window.
| Action | Format, Examples |
|---|---|
| (C) Add Customer |
listOR Click on Customers in menu bar > Address Book. Then, input add n/NAME p/PHONE_NUMBER e/EMAIL a/ADDRESS [t/TAG]… e.g., add n/James Ho p/22224444 e/jamesho@example.com a/123, Clementi Rd, 1234665 t/friend t/colleague
|
| (C) Delete Customer |
listOR Click on Customers in menu bar > Address Book. Then, input delete INDEXe.g., delete 3
|
| (C) Edit Customer details |
listOR Click on Customers in menu bar > Address Book. Then, input edit INDEX [n/NAME] [p/PHONE_NUMBER] [e/EMAIL] [a/ADDRESS] [t/TAG]…e.g., edit 2 n/James Lee e/jameslee@example.com
|
| (C) Find Customer |
listOR Click on Customers in menu bar > Address Book. Then, input find KEYWORD [MORE_KEYWORDS]e.g., find James Jake
|
| (C) Clear all contact entries in Customer Window |
listOR Click on Customers in menu bar > Address Book. Then, input clear
|
| (B) List Customer |
list OR Click on Customers in menu bar > Address Book then input list. |
| (M) Add Job |
add_job si/SENDER_ID ri/RECIPIENT_ID earn/EARNING [date/DELIVERY_DATE] [slot/DELIVERY_SLOT] e.g., add_job si/ALE874 ri/DAV910 date/2023-03-01 slot/3 earn/20 OR Alternative: Click on Delivery Job System in menu bar > Create Job > Specify job details > Click on Create Job. |
| (M) Import Jobs | Click on Delivery Job System in menu bar > Import Jobs > select CSV file containing jobs to be imported > open
|
| (M) List Job | list_job |
| (M) Edit Job |
edit_job INDEX [si/SENDER_ID] [ri/RECIPIENT_ID] [date/DELIVERY_DATE] [slot/DELIVERY_SLOT] [earn/EARNING] [done/t OR f] OR edit_job ji/JOB_ID [si/SENDER_ID] [ri/RECIPIENT_ID] [date/DELIVERY_DATE] [slot/DELIVERY_SLOT] [earn/EARNING] [done/t OR f] e.g., edit_job 1 slot/4 OR Click on the specific delivery job > Click on the middle pen button on top right hand corner > Make changes > Click on Edit Job button. |
| (M) Find Job |
find_job [ji/JOB_ID] [si/SENDER_ID] [ri/RECIPIENT_ID] [date/DELIVER_DATE] [slot/DELIVERY_SLOT] [earn/EARNING] [done/t OR f] e.g., find_job si/ALE874
|
| (M) Delete Job |
delete_job JOB_ID e.g., delete_job ALBE29E66F OR Alternative: Click on the delivery job > Click on the right bin button on top right hand corner. |
| (M) (Un)Complete Job |
com_job JOB_ID / uncom_job JOB_ID e.g., com_job ALBE29E66F / uncom_job ALBE29E66F OR Alternative 1: Scroll to the job and click on the circle on the left, which a tick will appear in to show completion. Click again to mark job as uncompleted. OR Alternative 2: Click on the specific delivery job > Click on the left tick button on top right hand corner. Click on the button again to uncomplete job. |
| (M) List reminder | list_reminder |
| (M) Add reminder |
add_reminder [d/DESCRIPTION] time/YYY-MM-DD HH:mm e.g., add_reminder d/Submit homework time/2023-12-12 12:00
|
| (M) Delete reminder |
delete_reminder INDEX e.g., delete_reminder 3
|
| (M) Show Timetable |
timetableOR Click on Timetable in menu bar > Scheduled Jobs
|
| (M) (T) Show Timetable of Specific Week |
timetable_date date/YYYY-mm-DDOR Click on Timetable in menu bar > Scheduled Jobs > input timetable_date date/YYYY-mm-DDe.g., timetable_date date/2023-03-30
|
| (M) Show List of Completed Jobs |
timetable_completedOR Click on Timetable in menu bar > Completed Jobs
|
| (M) Show List of Unscheduled Jobs |
timetable_unscheduledOR Click on Timetable in menu bar > Unscheduled Jobs
|
| (A) Help |
helpOR Click on Help in menu bar > Help
|
| (A) Exit |
exitOR Click on File in menu bar > Exit
|